
by Davey Waterson, JavaScript Architect, Aptana
There's no debate that JavaScript is the most widely used language client-side on the Web. Regardless of how the back-ends of your web applications are implemented, client side you're using JavaScript for everything from same form validations to full Ajax applications. Now imagine being able to develop web apps using JavaScript server-side too. Wouldn't being able to use the same language on both client and server simplify life for us developers?
Full Circle
If you were part of the early web's big bang in the mid-1990s you might recall that being able to use JavaScript both client-side and server-side was core to Netscape's original vision for Web apps. Netscape Livewire was the first server-side JavaScript engine. Now more than 10 years later, with Netscape's technology group having been transformed into The Mozilla Foundation, server-side JavaScript is seeing a strong resurgence because of the simplicity it provides to Web developers reinvigorated by the fact that today's CPUs can process JavaScript more than 10x faster than the CPUs of the mid-90's ever could. And just like before, it's the Mozilla team that's at the core of this latest evolution of the Web. In fact, the next JavaScript engine from Mozilla, TraceMonkey, is poised to boost JavaScript performance by factors of 20 to 40 times according to Brendan Eich, Mozilla CTO and the creator of JavaScript. In recent developments we also see the advent of other performant engines for JavaScript such as v8 from Google and squirrelfish for webKit, these engines are raising the bar on performance and help to maintain a competitive environment that will hopefully direct competitive focus on the performance aspect of all the major JavaScript implementations.
There are currently two main JavaScript engines used server-side and both are from the minds at Mozilla: Mozilla Rhino and Mozilla SpiderMonkey. Rhino is a JavaScript interpreter written in Java that can also bridge JavaScript to Java server-side. Steve Yegge of Google has been doing interesting work with this engine. SpiderMonkey on the other hand is the JavaScript engine (written in C) in the highly popular Mozilla Firefox browser. SpiderMonkey is what will evolve to become TraceMonkey. In addition, the Jaxer “Ajax server” (a project I work on at Aptana) is an example of SSJS that uses not only SpiderMonkey, but also embeds the entire Firefox browser engine in the application server such that you can do server-side DOM manipulation and other Ajaxy things server-side that Rhino was not built to do.
Let's take a look at various SSJS implementations and some examples of putting them to use.
Server-Side JavaScript (SSJS) via Embedded JavaScript Engines
The extension of JavaScript to the server is made possible via embedded JavaScript engines. The two most well established engines are SpiderMonkey and Rhino, both currently maintained by the Mozilla Foundation. SpiderMonkey is the code name for the first ever JavaScript engine, an open source C implementation which can be found embedded in leading software products such as Mozilla Firefox, Adobe Acrobat, and Aptana Jaxer. Rhino is a Java implementation of JavaScript which is commonly embedded in Java applications to expose scripting capability. The Helma web application framework is an example of Rhino in use. The Dojo Toolkit also has capabilities that run in Rhino. Let’s take a closer look at Rhino and its importance to the JavaScript developer.
Rhino offers a unique opportunity for the JavaScript developer to tap into the power of Java classes using JavaScript. Armed with some basic Java knowledge, you can extend JavaScript to include some of the most desired capability such as database access, remote web requests, and XML processing. We’ll start by taking a look at querying a SQL database.
This first example we’ll demonstrate is querying a mySQL database for some employee contact information. It is assumed that you have already downloaded, extracted, and consumed the necessary documentation to get up and running with some basic Rhino scripts. If you don’t already have it, you’ll need to also download the JDBC driver for mySQL, extract the class files, and include the path in your CLASSPATH environment variable. The code in Listing 1 is a sample JavaScript script which incorporates Java classes to handle the database query.
Listing 1 - Querying a mySQL database from Rhino
// import the java sql packages
importPackage( java.sql );

// load the mySQL driver
java.lang.Class.forName( "com.mysql.jdbc.Driver" );

// create connection to the database
var conn = DriverManager.getConnection( "jdbc:mysql://localhost/rhino", "uRhino", "pRhino" );

// create a statement handle
var stmt = conn.createStatement();

// get a resultset
var rs = stmt.executeQuery( "select * from employee" );

// get the metadata from the resultset
var meta = rs.getMetaData();

// loop over the records, dump out column names and values
while( rs.next() ) {
	for( var i = 1; i <= meta.getColumnCount(); i++ ) {
		print( meta.getColumnName( i ) + ": " + rs.getObject( i ) + "\n" );
	}
	print( "----------\n" );
}

// cleanup
rs.close();
stmt.close();
conn.close();
This code starts off by using a Rhino function named importPackage which is just like using the import statement in Java. Here, we’re including all the classes in the java.sql namespace in the script. The appropriate database driver for mySQL is loaded and the connection string to a database named rhino on my local machine is configured using the user account uRhino with the password of pRhino. The SQL statement is prepared, executed, and printed with the help of the metadata obtained from the resultset. Sample output is shown in Listing 2.
id: 1
first_name: Sammy
last_name: Hamm
department: IT
title: Network Administrator
----------
id: 2
first_name: Nigel
last_name: Bitters
department: Finance
title: Accounting Manager
...
It’s clear to see that with just a few lines of code, we can easily take advantage of SQL data stores in JavaScript. The sample script in Listing 1 could be factored out to it’s own function to retrieve the set of employee information, or abstracted further into a more generic data handler class. Next we’ll take a look at another powerful feature in Rhino, E4X processing.
E4X (ECMAScript for XML) is an extension of JavaScript which provides direct support for XML, greatly simplifying the process of consuming XML via JavaScript. Rhino’s support of this important standard eliminates the pain of using DOM or SAX based parsers in Java. Listing 3 below details a script used to process an RSS feed from the Mozilla website.
importPackage( java.net );

// connect to the remote resource
var u = new URL( "http://www.mozilla.org/news.rdf" );
var c = u.openConnection();
c.connect();

// read in the raw data
var s = new java.io.InputStreamReader( c.getInputStream() );
var b = new java.io.BufferedReader( s );
var l, str = "";

while( ( l = b.readLine() ) != null ) {
	// skip
	if( l != "" ) {
	str = str + l + "\n";
	}
}
// define the namespaces, first the default,
// then additional namespaces
default xml namespace = "http://purl.org/rss/1.0/";
var dc = new Namespace( "http://purl.org/dc/elements/1.1/" );
var rdf = new Namespace( "http://www.w3.org/1999/02/22-rdf-syntax-ns#" );

// use e4x to process the feed
var x = new XML( str );
for each( var i in x..item ) {
	print( "Title: " + i.title + "\n" );
	print( "About: " + i.@rdf::about + "\n" );
	print( "Link: " + i.link + "\n" );
	print( "Date: " + i.dc::date + "\n" );
}
The first half of this script is standard Java code used to retrieve the feed data. After the asset is retrieved and stored in a string, the proper namespaces are defined for this particular resource. The default namespace is defined along with two others, in particular dc and rdf. Defining these namespaces becomes important if we want to be able to access any data elements in the feed defined in these namespaces.
The act of creating an E4X object is quite simple, in the case of Listing 3, we do this through the line
var x = new XML( str );
From here, the XML is accessible via dot notation. Notice during the processing of the item element where we use the rdf and dc namespace to access the about attribute of the item element, and the date element respectively. The syntax for accessing E4X objects is actually quite natural and certainly easier than most methods.
JavaScript engines such as Rhino and SpiderMonkey on their own have proven to be a useful and powerful tool to the developer. However, taking advantage of frameworks such as Aptana Jaxer (SpiderMonkey) and Helma (Rhino) can reveal even greater rewards as a great deal of work has already been done for you. All you need to do is implement the JavaScript. Let’s take a closer look on the SpiderMonkey side with Jaxer.
As stated earlier, Aptana Jaxer is built using the Mozilla Browser Engine engine that powers Mozilla Firefox, which includes SpiderMonkey as its JavaScript interpreter, but lots more features beyond SSJS alone such as DOM, DB, File IO, CSS, server sessions, E4X, etc...] This is a great advantage to the developer as it presents a consistent server-side and client-side development environment for both browser and server contexts that is centered on open source and Web standards. Also since you know which engine you're targeting, you're free to confidently use advanced built in controls such as XML processing via E4X, XPath, and XSLT. Let's take a tour through some of the top features of Jaxer through code examples.
Jaxer – Server-Side Ajax via the Firefox Browser Engine on the server
Although server-side JavaScript is not a new concept, Jaxer implements it in a unique fashion. By taking advantage of current ScriptMonkey and Ajax capabilities not to mention the loads of other features packed into the Mozilla Firefox Browser Engine, Aptana Jaxer fuses the client-side with the server-side, creating a unified “same language” development platform. Where once you would need to master not only JavaScript for the client-side but also some flavor of a server-side Web language, Jaxer puts all the rich capability of a server-side language into JavaScript. This accounts for added simplicity and promotes rapid development methodologies.
Managing Context
To take advantage of all the operating contexts of Jaxer, you'll need to specify how your scripts should behave using the runat attribute of the script tag (or by setting a runat property on a JavaScript function object). The common values for this attribute are explained below, though there are more than just these.
-
runat=”client” – Code contained in this block is restricted to execution client-side, which is also what happens if no runat attribute is specified.
-
runat=”server” – Code contained in this block is restricted to execution server-side.
-
runat=”both” – Code may be invoked on the client or server side.
-
runat=”server-proxy” – Allows for the exposure of server-side JavaScript functions to the browser. Jaxer manages Ajax calls behind the scenes to accomplish this.
While most of the runat attribute values above are self explanatory, the server-proxy concept is best explained through example. Consider the code in Listing 4.
Listing 4 - Demonstration of server and client context
<script runat="server">
function exposed() {
	return "exposed to the browser";
}

function notExposed() {
	return "can't see me!";
}
</script>


<script runat="client">
alert( exposed() );
alert( notExposed() );
</script>
There are two blocks of scripts defined, one with runat set to server and the other set to client. This creates a strict separation of the two environments. As it stands, the code in the client block would throw an error since the server-side JavaScript is not within scope. If you intend to allow the execution of server-side JavaScript from the client-side, you can correct the code in listing 1 by doing one of three things.
-
Change the runat attribute value of server to server-proxy.
-
Add a statement inside the server-side script block to expose a particular server-side function to the browser. This statement is of the form <functionName>.proxy = true.
-
Ensure the server-side function name is contained within the Jaxer.proxies array.
Generally it's a best practice to use either the second or third strategy since in this case you are exposing only what's needed to the client. See Listing 5 for an update to Listing 1 to reflect this.
Listing 5 - Demonstration of server-proxy
<script runat="server">
function notExposed() {
	// runs on the server, hidden from the browser
	return "can't see me!";
}

function exposed() {
	// runs on the server, callable from the browser
	return "exposed to the browser";
}
exposed.proxy = true; // tell Jaxer this function is ok to be called from the browser
</script>

<script runat="client" type="text/javascript">
alert( exposed() ); //works like a charm
alert( notExposed() ); //produces an object not found error since it server-side only
</script>
Understanding the concept of operating context in Jaxer is central to moving forward with the example application which is what we'll examine next.
Jaxer – Example Application
The example application consists of a simple form used to accept comments from public users and was built to cover some of the most useful Jaxer features. The example application is running under Jaxer build 0.9.7.2472 and also incorporates the ExtJS version 2.1 JavaScript framework for user interface controls. For more information how to obtain and install these products, refer to the resources section.
Single Page Applications
The first feature the application demonstrates is the concept of a single page application. Since Jaxer allows you to define which code is reserved for the server-side, which code stays on the client-side, and which code is shared between the two, it's very possible to produce a single page application which could also include any number of external assets such as a popular third party framework. Listing 6 shows the beginning of our application which takes advantage of some of these concepts.
Listing 6 - Creating the User Interface
<link href="/jaxer_examples/js/ext-2.1/resources/css/ext-all.css" type="text/css" rel="stylesheet"/>
<script src="/jaxer_examples/js/ext-2.1/adapter/ext/ext-base.js"/>
<script src="/jaxer_examples/js/ext-2.1/ext-all.js"/>

<link href="/jaxer_examples/css/main.css" type="text/css" rel="stylesheet"/>

<script runat="both" src="/jaxer_examples/js/validateComments.js"/>

<script>
var txt_name;
var txt_email;
var txt_message;
var btn_comments;
var form_comments;

Ext.onReady( function() {
	// create the name text field
	txt_name = new Ext.form.TextField({
		name: "name",
		fieldLabel: "Name",
		width: 200
	});

	// create the e-mail text field
	txt_email = new Ext.form.TextField({
		name: "email",
		fieldLabel: "E-mail",
		width: 200
	});

	// create the message text field
	txt_message = new Ext.form.TextArea({
		name: "message",
		fieldLabel: "Message",
		width: 200
	});

	// create a button used to send the form details.
		btn_comments = new Ext.Button({
		text: "Submit",
		fieldLabel: "",
		handler: formHandler
	});

// create the form panel, attach the inputs
form_comments = new Ext.form.FormPanel({
		labelAlign: "right",
		width: 400,
		title: "Comments",
		items: [
			txt_name,
			txt_email,
			txt_message,
			btn_comments
		],
		renderTo: "form-comments"
	});

});
</script>
The code in Listing 6 starts by hooking in the Ext JS library which is used to produce the UI elements of the form. Next a script named validateComments.js is hooked in with the runat attribute set to both. The function defined within this file checks the form to make sure it is complete, returning a boolean. The both context it operates within is a very powerful concept as we are able to use this code to check values entered in the form on both the client and server side. No custom validation libraries for each environment makes for rapid development with less risk for error.
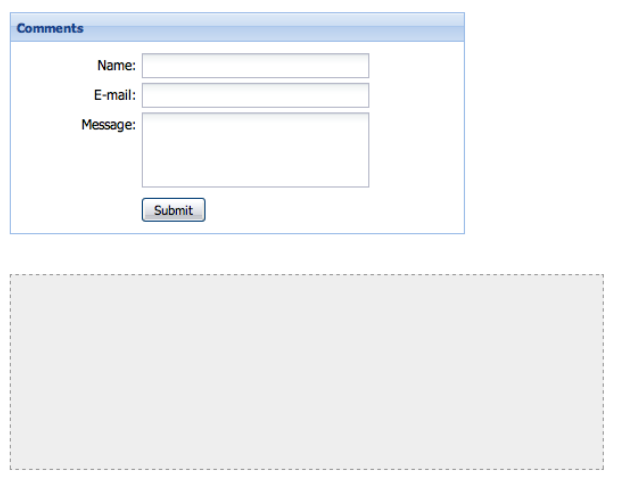
Towards the bottom of the code are two div tags with ids form-comments and out-logger. The form-comments div is used to render the form and the out-logger will be used as a log display as each comment is added. The completed user interface is shown in Figure 1.
Figure 1 – The user interface
Server-Side DOM Processing
Another powerful concept of Jaxer is the ability to access the DOM server-side with JavaScript. This gives you added control to interrogate and manage the document structure before it's pushed to the client. Listing 7 contains the code which demonstrates this concept.
Listing 7 - Manipulating the DOM server-side
<script runat="server">
	window.onserverload = function() {
		document.getElementById( "out-logger" ).innerHTML = Jaxer.File.read( "dump.txt" );
	}
</script>
The code in listing 7 is executed server-side and takes advantage of the onserverload event which ensures that we have a complete DOM before trying to access it. This code is simple in that it updates the innerHTML of the logging div with the contents of a text file. The contents of this file are obtained through the file I/O capabilities exposed by Jaxer which is what we'll examine next.
File I/O
Jaxer ships with a comprehensive filesystem I/O capability that is very useful. There are numerous methods in this namespace which allow for a simple, yet powerful approach to file management. The example application uses this capability to log comments submitted by the form to a plain text file named dump.txt. Listing 8 shows the two functions used to handle the comment submission process.
Listing 8 - Submitting Comment Data
<script>
function formHandler() {

// get the form values
	var name = txt_name.getValue();
	var email = txt_email.getValue();
	var message = txt_message.getValue();

	// if the form passes validation client-side, submit results to the processor
	if( validateComments( name, email, message ) ) {
		formProcessor( name, email, message );
		// update the logger with the most recent entry
		document.getElementById( "out-logger" ).innerHTML += "name: " + name + "<br/>email: " + email + "<br/>message: " + message + "<br/><br/>";
	} else {
		Ext.Msg.alert( "Error", "Please enter the required fields" );
	}
}
</script>

<!-- processes the form contents -->
<script runat="server">
function formProcessor( name, email, message ) {
	// perform the same validation of the data server-side
	if( !validateComments( name, email, message ) ) {
		throw "Incomplete data was submitted.";
	}
	// assemble the string
	var s = "name: " + name + "<br/>" +
	"email: " + email + "<br/>" +
	"message: " + message + "<br/><br/>";
	// append the entry to the log file
	Jaxer.File.append( "dump.txt", s );
}
formProcessor.proxy = true;
</script>
The first function, formHandler, performs some first-level validation using the validateComments function. If it passes validation, the formProcessor server-side function is invoked which does the same validation check using the shared validateComments function. Finally, the comment information is assembled into a string and appended to the dump file.
Database Access
For more robust data management, Jaxer comes with the ability to manage data in either a SQLite database which is included in Jaxer, or a mySQL database, and is extensible to others. Much like the file I/O namespace, database access in Jaxer can be as simple or complicated as you want or need it to be. For debugging, Jaxer will also send database errors to the client if you want.
Upgrading the example application to include database access requires just a few lines of code added to the formProcessor method. Listing 9 demonstrates these changes.
Listing 9 - Jaxer database access
<script runat="server">
function formProcessor( name, email, message ) {

	// perform the same validation of the data server-side
	if( !validateComments( name, email, message ) ) {
		throw "Incomplete data was submitted.";
	}

	// assemble the string
	var s = "name: "    + name    + "<br/>" +
			"email: "   + email   + "<br/>" +
			"message: " + message + "<br/><br/>";

	// append the entry to the log file
	Jaxer.File.append( "dump.txt", s );

	// add support for management via database
	Jaxer.DB.execute( "create table if not exists comments ( id integer primary key auto_increment, " +
															"name varchar(50) not null, "             +
															"email varchar(255) not null, "           +
															"message varchar(300) not null )" );

	Jaxer.DB.execute( "insert into comments ( name, email, message ) values ( ?, ?, ? )", [ name, email, message ] );

}

formProcessor.proxy = true;
</script>
The first statement which uses the Jaxer.DB namespace creates a new database table in the default SQLite database if it doesn't already exist. You can see the field names and data types which make sense for the type of data that's been added. The second statement is just a simple insert statement using the data obtained from the form. Placeholders in the form of '?' are used to match up the argument values with their proper position in the insert statement.
XML Processing
The final feature we'll explore is XML processing with a particular emphasis first on the capability to create a simple XML service on the server-side, then use the E4X capabilities to processes it.
Listing 10 demonstrates the configuration of a simple service we're able to advertise through Jaxer using the data from the database we captured from prior form submissions.
Listing 10 - Creating a simple XML service
<script runat="server">
var rs_comments = Jaxer.DB.execute("SELECT * FROM Comments");
var doc = document.implementation.createDocument('', 'comments', null);
var root = doc.documentElement;
rs_comments.rows.forEach(function(row, index)
{
if (true || index < 10)
{
var node = doc.createElement('comment');
node.setAttribute('id', row.id);
node.setAttribute('name', row.name);
node.setAttribute('message', row.message);
root.appendChild(node);
}
});
Jaxer.response.exit(200, doc);
</script>
The data from the database is represented in XML format as follows:
<comments> <comment message="”Jaxer" name="”Nigel" id="”1”"></comment> ... more comments ... </comments>
Now that we've created this simple XML feed, we can now also consume it using the code from Listing 11.
Listing 11 - Consuming the XML feed
<script runat="server">
var r = Jaxer.Web.get("service.html", {as: 'e4x'});
for (var i=0, len = r.comment.length(); i<len; i++) {
	var comment = r.comment[i];
	document.write('id: ' + comment.@id + '<br/>');
	document.write('name: ' + comment.@name + '<br/>');
	document.write('message: ' + comment.@message + '<br/>');
	document.write('<hr/>');
}
</script>
The code in Listing 11 is very simple. First a call to get the XML feed is made using the get method from the Jaxer.Web namespace, using the option that requests the response as a new E4X object. The comment nodes are looped over with data output using the simplified E4X syntax.
Out of all the features we looked at, this one has to be my favorite. To be able to use Jaxer to essentially create an XML based RESTful service in JavaScript is useful and shifts a great deal of power to the JavaScript developer.
Conclusion
JavaScript can be successfully used for full application development on both the client and server, fulfilling Netscape's original vision for a single, unified language for the Web that makes apps easier to develop and maintain. Advances such as Ajax and running Ajax on the server side with the Jaxer server boosted by today's faster JavaScript engines and radically faster ones like TraceMonkey to come from Mozilla, sets the stage for significant use of server-side JavaScript now.
Resources
-
Ext JS