
Events are actions or occurrences that happen in the system you are programming, which the system tells you about so you can respond to them in some way if desired. For example, if the user selects a button on a webpage, you might want to respond to that action by displaying an information box. In this article, we discuss some important concepts surrounding events, and look at how they work in browsers. This won't be an exhaustive study; just what you need to know at this stage.
| Prerequisites: | Basic computer literacy, a basic understanding of HTML and CSS, JavaScript first steps. |
|---|---|
| Objective: | To understand the fundamental theory of events, how they work in browsers, and how events may differ in different programming environments. |
A series of fortunate events
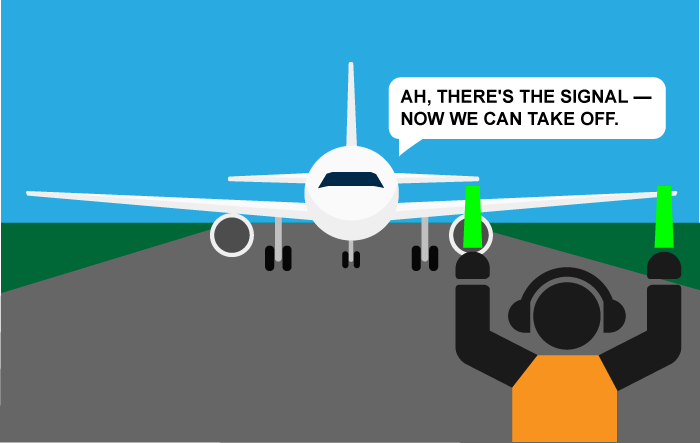
As mentioned above, events are actions or occurrences that happen in the system you are programming — the system produces (or "fires") a signal of some kind when an event occurs, and provides a mechanism by which an action can be automatically taken (that is, some code running) when the event occurs. For example, in an airport, when the runway is clear for take off, a signal is communicated to the pilot. As a result, the plane can safely takeoff.
In the case of the Web, events are fired inside the browser window, and tend to be attached to a specific item that resides in it — this might be a single element, set of elements, the HTML document loaded in the current tab, or the entire browser window. There are many different types of events that can occur. For example:
- The user selects a certain element or hovers the cursor over a certain element.
- The user chooses a key on the keyboard.
- The user resizes or closes the browser window.
- A web page finishes loading.
- A form is submitted.
- A video is played, paused, or finishes.
- An error occurs.
You can gather from this (and from glancing at the MDN Event reference) that there are a lot of events that can be responded to.
Each available event has an event handler, which is a block of code (usually a JavaScript function that you as a programmer create) that runs when the event fires. When such a block of code is defined to run in response to an event, we say we are registering an event handler. Note: Event handlers are sometimes called event listeners — they are pretty much interchangeable for our purposes, although strictly speaking, they work together. The listener listens out for the event happening, and the handler is the code that is run in response to it happening.
Note: Web events are not part of the core JavaScript language — they are defined as part of the APIs built into the browser.
A simple example
Let's look at a simple example of what we mean here. You've already seen events and event handlers used in many of the examples, but let's recap just to cement our knowledge. In the following example, we have a single <button>, which when pressed, makes the background change to a random color:
<button>Change color</button>
button { margin: 10px };
The JavaScript looks like so:
const btn = document.querySelector('button');

function random(number) {
  return Math.floor(Math.random() * (number+1));
}

btn.onclick = function() {
  const rndCol = 'rgb(' + random(255) + ',' + random(255) + ',' + random(255) + ')';
  document.body.style.backgroundColor = rndCol;
}
In this code, we store a reference to the button inside a constant called btn, using the Document.querySelector() function. We also define a function that returns a random number. The third part of the code is the event handler. The btn constant points to a <button> element, and this type of object has a number of events that can fire on it, and therefore, event handlers available. We are listening for the click event firing, by setting the onclick event handler property to equal an anonymous function containing code that generates a random RGB color and sets the <body> background-color equal to it.
This code is run whenever the click event fires on the <button> element, that is, whenever a user selects it.
The example output is as follows:
It's not just web pages
Another thing worth mentioning at this point is that events are not unique to JavaScript — most programming languages have some kind of event model, and the way the model works often differs from JavaScript's way. In fact, the event model in JavaScript for web pages differs from the event model for JavaScript as it is used in other environments.
For example, Node.js is a very popular JavaScript runtime that enables developers to use JavaScript to build network and server-side applications. The Node.js event model relies on listeners to listen for events and emitters to emit events periodically — it doesn't sound that different, but the code is quite different, making use of functions like on() to register an event listener, and once() to register an event listener that unregisters after it has run once. The HTTP connect event docs provide a good example.
You don't need to understand anything about other such environments at this stage in your learning; we just wanted to make it clear that events can differ in different programming environments.
Ways of using web events
There are a number of ways to add event listener code to web pages so it runs when the associated event fires. In this section, we review the various mechanisms and discuss which ones you should use.
Event handler properties
These are the properties that exist to contain event handler code we have seen most frequently during the course. Returning to the above example:
const btn = document.querySelector('button');

btn.onclick = function() {
  const rndCol = 'rgb(' + random(255) + ',' + random(255) + ',' + random(255) + ')';
  document.body.style.backgroundColor = rndCol;
}
The onclick property is the event handler property being used in this situation. It is essentially a property like any other available on the button (e.g. btn.textContent, or btn.style), but it is a special type — when you set it to be equal to some code, that code is run when the event fires on the button.
You could also set the handler property to be equal to a named function name (like we saw in Build your own function). The following works just the same:
const btn = document.querySelector('button');

function bgChange() {
  const rndCol = 'rgb(' + random(255) + ',' + random(255) + ',' + random(255) + ')';
  document.body.style.backgroundColor = rndCol;
}

btn.onclick = bgChange;
There are many different event handler properties available. Let's experiment.
First, make a local copy of random-color-eventhandlerproperty.html, and open it in your browser. It's just a copy of the simple random color example we've played with already. Now try changing btn.onclick to the following different values in turn, and observing the results in the example:
btn.onfocusandbtn.onblur— The color changes when the button is focused and unfocused; try pressing the tab to focus on the button and press the tab again to focus away from the button. These are often used to display information about filling in form fields when they are focused, or displaying an error message if a form field is filled with an incorrect value.btn.ondblclick— The color changes only when the button is double-clicked.window.onkeypress,window.onkeydown,window.onkeyup— The color changes when a key is pressed on the keyboard. Thekeypressevent refers to a general press (button down and then up), whilekeydownandkeyuprefer to just the key down and key up parts of the keystroke, respectively. Note: It doesn't work if you try to register this event handler on the button itself — we've had to register it on the window object, which represents the entire browser window.btn.onmouseoverandbtn.onmouseout— The color changes when the mouse pointer hovers over the button, or when the pointer moves off the button, respectively.
Some events are general and available nearly anywhere (e.g. an onclick handler can be registered on nearly any element), whereas some are more specific and only useful in certain situations (e.g. it makes sense to use onplay only on specific elements, such as <video>).
Inline event handlers — don't use these
You might also see a pattern like this in your code:
<button onclick="bgChange()">Press me</button>
function bgChange() {
  const rndCol = 'rgb(' + random(255) + ',' + random(255) + ',' + random(255) + ')';
  document.body.style.backgroundColor = rndCol;
}
Note: You can find the full source code for this example on GitHub (also see it running live).
The earliest method of registering event handlers found on the Web involved event handler HTML attributes (or inline event handlers) like the one shown above — the attribute value is literally the JavaScript code you want to run when the event occurs. The above example invokes a function defined inside a <script> element on the same page, but you could also insert JavaScript directly inside the attribute, for example:
<button onclick="alert('Hello, this is my old-fashioned event handler!');">Press me</button>
You can find HTML attribute equivalents for many of the event handler properties; however, you shouldn't use these — they are considered bad practice. It might seem easy to use an event handler attribute if you are doing something really quick, but they quickly become unmanageable and inefficient.
For a start, it is not a good idea to mix up your HTML and your JavaScript, as it becomes hard to parse — keeping your JavaScript separate is best practice; if it is in a separate file you can apply it to multiple HTML documents.
Even in a single file, inline event handlers are not a good idea. One button is OK, but what if you had 100 buttons? You'd have to add 100 attributes to the file; it would quickly turn into a maintenance nightmare. With JavaScript, you could easily add an event handler function to all the buttons on the page no matter how many there were, using something like this:
const buttons = document.querySelectorAll('button');

for (let i = 0; i < buttons.length; i++) {
  buttons[i].onclick = bgChange;
}
Note that another option here would be to use the forEach() built-in method available on NodeList objects:
buttons.forEach(function(button) {
  button.onclick = bgChange;
});
Note: Separating your programming logic from your content also makes your site more friendly to search engines.
addEventListener() and removeEventListener()
The newest type of event mechanism is defined in the Document Object Model (DOM) Level 2 Events Specification, which provides browsers with a new function — addEventListener(). This functions in a similar way to the event handler properties, but the syntax is obviously different. We could rewrite our random color example to look like this:
const btn = document.querySelector('button');

function bgChange() {
  const rndCol = 'rgb(' + random(255) + ',' + random(255) + ',' + random(255) + ')';
  document.body.style.backgroundColor = rndCol;
}

btn.addEventListener('click', bgChange);
Note: You can find the full source code for this example on GitHub (also see it running live).
Inside the addEventListener() function, we specify two parameters — the name of the event we want to register this handler for, and the code that comprises the handler function we want to run in response to it. Note: It is perfectly appropriate to put all the code inside the addEventListener() function, in an anonymous function, like this:
btn.addEventListener('click', function() {
  var rndCol = 'rgb(' + random(255) + ',' + random(255) + ',' + random(255) + ')';
  document.body.style.backgroundColor = rndCol;
});
This mechanism has some advantages over the older mechanisms discussed earlier. First, there is a counterpart function, removeEventListener(), which removes a previously added listener. For example, this would remove the listener set in the first code block in this section:
btn.removeEventListener('click', bgChange);
This isn't significant for simple, small programs, but for larger, more complex programs it can improve efficiency to clean up old unused event handlers. Plus, this allows you to have the same button performing different actions in different circumstances — all you have to do is add or remove event handlers as appropriate.
Second, you can register multiple handlers for the same listener. The following two handlers wouldn't both be applied:
myElement.onclick = functionA;
myElement.onclick = functionB;
The second line overwrites the value of onclick set by the first line. This would work, however:
myElement.addEventListener('click', functionA);
myElement.addEventListener('click', functionB);
Both functions would now run when the element is selected.
In addition, there are other powerful features and options available with this event mechanism. These are a little out of scope for this article, but if you want to read them, visit the addEventListener() and removeEventListener() reference pages.
What mechanism should I use?
Of the three mechanisms, you shouldn't use the HTML event handler attributes — these are outdated, and bad practice, as mentioned above.
The other two are relatively interchangeable, at least for simple uses:
- Event handler properties have less power and options, but better cross-browser compatibility (being supported as far back as Internet Explorer 8). You should probably start with these as you begin learning.
- DOM Level 2 Events (
addEventListener(), etc.) are more powerful, but can also become complex and are less well supported (supported as far back as Internet Explorer 9). You should also experiment with these, and try to use them where possible.
The main advantages of the third mechanism are that you can remove event handler code if needed, using removeEventListener(), and you can add multiple listeners of the same type to elements if required. For example, you can call addEventListener('click', function() { ... }) on an element multiple times, with different functions specified in the second argument. This is impossible with event handler properties because any subsequent attempts to set a property will overwrite earlier ones, e.g.:
element.onclick = function1;
element.onclick = function2;
etc.
Note: If you are called on to support browsers older than Internet Explorer 8, you may run into difficulties, as such ancient browsers use different event models from newer browsers. But never fear, most JavaScript libraries (for example jQuery) have built-in functions that abstract away cross-browser differences. Don't worry about this too much at this stage in your learning journey.
Other event concepts
In this section, we briefly cover some advanced concepts that are relevant to events. It is not important to understand these concepts fully at this point, but they might serve to explain some code patterns you'll likely come across.
Event objects
Sometimes inside an event handler function, you'll see a parameter specified with a name such as event, evt, or simply e. This is called the event object, and it is automatically passed to event handlers to provide extra features and information. For example, let's rewrite our random color example again slightly:
function bgChange(e) {
  const rndCol = 'rgb(' + random(255) + ',' + random(255) + ',' + random(255) + ')';
  e.target.style.backgroundColor = rndCol;
  console.log(e);
}

btn.addEventListener('click', bgChange);
Note: You can find the full source code for this example on GitHub (also see it running live).
Here you can see we are including an event object, e, in the function, and in the function setting a background color style on e.target — which is the button itself. The target property of the event object is always a reference to the element the event occurred upon. So, in this example, we are setting a random background color on the button, not the page.
Note: You can use any name you like for the event object — you just need to choose a name that you can then use to reference it inside the event handler function. e/evt/event are most commonly used by developers because they are short and easy to remember. It's always good to be consistent — with yourself, and with others if possible.
e.target is incredibly useful when you want to set the same event handler on multiple elements and do something to all of them when an event occurs on them. You might, for example, have a set of 16 tiles that disappear when selected. It is useful to always be able to just set the thing to disappear as e.target, rather than having to select it in some more difficult way. In the following example (see useful-eventtarget.html for the full source code; also see it running live here), we create 16 <div> elements using JavaScript. We then select all of them using document.querySelectorAll(), then loop through each one, adding an onclick handler to each that makes it so that a random color is applied to each one when selected:
const divs = document.querySelectorAll('div');

for (let i = 0; i < divs.length; i++) {
  divs[i].onclick = function(e) {
    e.target.style.backgroundColor = bgChange();
  }
}
The output is as follows (try clicking around on it — have fun):
Most event handlers you'll encounter have a standard set of properties and functions (methods) available on the event object; see the Event object reference for a full list. Some more advanced handlers, however, add specialist properties containing extra data that they need to function. The Media Recorder API, for example, has a dataavailable event, which fires when some audio or video has been recorded and is available for doing something with (for example saving it, or playing it back). The corresponding ondataavailable handler's event object has a data property available containing the recorded audio or video data to allow you to access it and do something with it.
Preventing default behavior
Sometimes, you'll come across a situation where you want to prevent an event from doing what it does by default. The most common example is that of a web form, for example, a custom registration form. When you fill in the details and select the submit button, the natural behavior is for the data to be submitted to a specified page on the server for processing, and the browser to be redirected to a "success message" page of some kind (or the same page, if another is not specified.)
The trouble comes when the user has not submitted the data correctly — as a developer, you want to prevent the submission to the server and give an error message saying what's wrong and what needs to be done to put things right. Some browsers support automatic form data validation features, but since many don't, you are advised to not rely on those and implement your own validation checks. Let's look at a simple example.
First, a simple HTML form that requires you to enter your first and last name:
<form>
  <div>
    <label for="fname">First name: </label>
    <input id="fname" type="text">
  </div>
  <div>
    <label for="lname">Last name: </label>
    <input id="lname" type="text">
  </div>
  <div>
     <input id="submit" type="submit">
  </div>
</form>
<p></p>
div {
  margin-bottom: 10px;
}
Now some JavaScript — here we implement a very simple check inside an onsubmit event handler (the submit event is fired on a form when it is submitted) that tests whether the text fields are empty. If they are, we call the preventDefault() function on the event object — which stops the form submission — and then display an error message in the paragraph below our form to tell the user what's wrong:
const form = document.querySelector('form');
const fname = document.getElementById('fname');
const lname = document.getElementById('lname');
const para = document.querySelector('p');

form.onsubmit = function(e) {
  if (fname.value === '' || lname.value === '') {
    e.preventDefault();
    para.textContent = 'You need to fill in both names!';
  }
}
Obviously, this is pretty weak form validation — it wouldn't stop the user validating the form with spaces or numbers entered into the fields, for example — but it is OK for example purposes. The output is as follows:
Note: for the full source code, see preventdefault-validation.html (also see it running live here.)
Event bubbling and capture
The final subject to cover here is something that you won't come across often, but it can be a real pain if you don't understand it. Event bubbling and capture are two mechanisms that describe what happens when two handlers of the same event type are activated on one element. Let's look at an example to make this easier — open up the show-video-box.html example in a new tab (and the source code in another tab.) It is also available live below:
This is a pretty simple example that shows and hides a <div> with a <video> element inside it:
<button>Display video</button>

<div class="hidden">
  <video>
    <source src="rabbit320.mp4" type="video/mp4">
    <source src="rabbit320.webm" type="video/webm">
    <p>Your browser doesn't support HTML5 video. Here is a <a href="rabbit320.mp4">link to the video</a> instead.</p>
  </video>
</div>
When the <button> is selected, the video is displayed, by changing the class attribute on the <div> from hidden to showing (the example's CSS contains these two classes, which position the box off the screen and on the screen, respectively):
btn.onclick = function() {
  videoBox.setAttribute('class', 'showing');
}
We then add a couple more onclick event handlers — the first one to the <div> and the second one to the <video>. Now, when the area of the <div> outside the video is selected, the box should be hidden again and when the video itself is selected, the video should start to play.
videoBox.onclick = function() {
  videoBox.setAttribute('class', 'hidden');
};

video.onclick = function() {
  video.play();
};
But there's a problem — currently, when you select the video it starts to play, but it causes the <div> to be hidden at the same time. This is because the video is inside the <div> — it is part of it — so selecting the video actually runs both the above event handlers.
Bubbling and capturing explained
When an event is fired on an element that has parent elements (in this case, the <video> has the <div> as a parent), modern browsers run two different phases — the capturing phase and the bubbling phase.
In the capturing phase:
- The browser checks to see if the element's outer-most ancestor (
<html>) has anonclickevent handler registered on it for the capturing phase, and runs it if so. - Then it moves on to the next element inside
<html>and does the same thing, then the next one, and so on until it reaches the element that was actually selected.
In the bubbling phase, the exact opposite occurs:
- The browser checks to see if the element selected has an
onclickevent handler registered on it for the bubbling phase, and runs it if so. - Then it moves on to the next immediate ancestor element and does the same thing, then the next one, and so on until it reaches the
<html>element.

(Select the image for a bigger diagram)
In modern browsers, by default, all event handlers are registered for the bubbling phase. So in our current example, when you select the video, the event bubbles from the <video> element outwards to the <html> element. Along the way:
- It finds the
video.onclick...handler and runs it, so the video first starts playing. - It then finds the
videoBox.onclick...handler and runs it, so the video is hidden as well.
Note: In cases where both types of event handlers are present, bubbling and capturing, the capturing phase will run first, followed by the bubbling phase.
Fixing the problem with stopPropagation()
This is a very annoying behavior, but there is a way to fix it! The standard Event object has a function available on it called stopPropagation() which, when invoked on a handler's event object, makes it so that first handler is run but the event doesn't bubble any further up the chain, so no more handlers will be run.
We can, therefore, fix our current problem by changing the second handler function in the previous code block to this:
video.onclick = function(e) {
  e.stopPropagation();
  video.play();
};
You can try making a local copy of the show-video-box.html source code and fixing it yourself, or looking at the fixed result in show-video-box-fixed.html (also see the source code here).
Note: Why bother with both capturing and bubbling? Well, in the bad old days when browsers were much less cross-compatible than they are now, Netscape only used event capturing, and Internet Explorer used only event bubbling. When the W3C decided to try to standardize the behavior and reach a consensus, they ended up with this system that included both, which is the one modern browsers implemented.
Note: As mentioned above, by default all event handlers are registered in the bubbling phase, and this makes more sense most of the time. If you really want to register an event in the capturing phase instead, you can do so by registering your handler using addEventListener(), and setting the optional third property to true.
Event delegation
Bubbling also allows us to take advantage of event delegation — this concept relies on the fact that if you want some code to run when you select any one of a large number of child elements, you can set the event listener on their parent and have events that happen on them bubble up to their parent rather than having to set the event listener on every child individually. Remember, bubbling involves checking the element the event is fired on for an event handler first, then moving up to the element's parent, etc.
A good example is a series of list items — if you want each one to pop up a message when selected, you can set the click event listener on the parent <ul>, and events will bubble from the list items to the <ul>.
This concept is explained further on David Walsh's blog, with multiple examples — see How JavaScript Event Delegation Works.
Test your skills!
You've reached the end of this article, but can you remember the most important information? To verify you've retained this information before you move on — see Test your skills: Events.
Conclusion
You should now know all you need to know about web events at this early stage. As mentioned, events are not really part of the core JavaScript — they are defined in browser Web APIs.
Also, it is important to understand that the different contexts in which JavaScript is used have different event models — from Web APIs to other areas such as browser WebExtensions and Node.js (server-side JavaScript). We are not expecting you to understand all of these areas now, but it certainly helps to understand the basics of events as you forge ahead with learning web development.
If there is anything you didn't understand, feel free to read through the article again, or contact us to ask for help.
See also
- Event order (discussion of capturing and bubbling) — an excellently detailed piece by Peter-Paul Koch.
- Event accessing (discussion of the event object) — another excellently detailed piece by Peter-Paul Koch.
- Event reference